HUGOの設定を掲載します。
自分の備忘録要素が強いのでHUGO以外の周辺設定も含みます。
2023/08/03 変更
githubに公開しました
2023/06/25 変更
- googleAnalyticsのGA4対応
- やっと対応
- config.tomlを弄るだけで済みました
- disqus無効化
config.toml全容
githubでご確認ください
wordpressからの移行
もともと、HUGO導入はlifehack.jpのこちら↓の記事がきっかけです
https://lifehacking.jp/2020/05/goodbye-wordpress-hello-hugo/
wordpress to hugo exporter を使ってざっくり変換し、微調整はpythonでスクリプトを書いて対応しました
テーマ robust
テーマはrobustを利用させていただいてます
git clone ではなく、ダウンロードしています。
最初はgit clone でテーマを引っ張ってきましたが、コミットできず、エラーがでたのでやめました。
そもそもgitを使い慣れていませんので、zipをダウンロードして置き直しました。
これでコミットできたのでそのままとしています。
robustのサムネイル画像
static/images に配置
記事のサムネイルは、フロントマターの thumbnail で指定できます。 指定しないと、デフォルトのサムネイルが設定されます。画像ファイルは、 static/images/default.jpg に配置してください。 デフォルトのサムネイルがない場合、テーマで用意されているデフォルトサムネイルが設定されます。
テーマ選別
robust以前に試したいくつかを紹介します
ananke
hugoのquick startはanankeが使われています
- 見た目が好きじゃない
- サムネイル画像の指定が、frontmatterでfeatured_imageでいけ、記事と同じフォルダに置くことができる
Tranquilpeak
- https://zenn.dev/harachan/articles/a043e9a756cae4
- デザインは一番好き
- 解説ページが多い
- サムネイル表示できない
- featured imageだとだめ
HUGO バージョン
- windows10,11で使用
- ポータブル版
- binフォルダはpathを通す
# hugo version

hugo v0.92.0-B3549403+extended windows/amd64 BuildDate=2022-01-12T08:23:18Z VendorInfo=gohugoio
ローカルで確認
# draft記事も表示 以下のいずれか
hugo server -D
hugo -D server

# draft記事は非表示(公開した状態と同じ)
hugo server
コマンドを実行したあと以下にアクセス
http://localhost:1313/
新規作成
サイトを新規作成
“hoge"というサイトを作成
hugo new site hoge
新規記事を作成
posts以下に記事名"A"で記事を作成
hugo new posts/A/index.md
自分ルール
- 記事中の画像はindex.md(記事本体)と同じ場所に置く(page bundle)
- サムネイル画像はstatic/images 以下に置く
- 別々の管理がちょっと嫌だがまあよし
- robustがその方法のため
目次
参考: https://www.d4af.com/post/2017/10/hugo-static-site-3/
# frontmatter
---
toc: true
---
参考: https://gohugo.io/getting-started/configuration-markup/
tocはendLevelとstartLevelを調整することで、tocに番号が振られた
# config.toml(抜粋)

[markup.tableOfContents]
endLevel = 5
ordered = false
startLevel = 1
目次に関して試したこと
\themes\hugo_theme_robust\layouts\_default\single.htmlに追加してみたが、ページ表示がtocだけになってしまった- テーマによっては使えないらしい
- robustでは使えないのかもしれない
- 公式にもtoc: true としか書いてなかった
- 記事ごとにfrontmatterにtoc: trueを追加しなくて良さそうだったので、できればよかったのだが
- tocを判別して自動で出してくれる その3
記事の公開、非公開
# frontmatter
---
draft: false
---
とすれば、公開される
参考: https://qiita.com/silmisilon/items/b81355907e8660abcb3a
frontmatterの形式
- yaml形式(—)で書いている
- wordpress to hugo exporter の出力がyamlだったため
- toml(+++)でもよい
- その場合は:を=にする
ロゴ画像
- https://masaqu.id/posts/2019-06-11_robust-customize/#%E3%82%B5%E3%82%A4%E3%83%88%E5%90%8D%E3%81%AE%E6%A8%AA%E3%81%AB%E3%82%A2%E3%82%A4%E3%82%B3%E3%83%B3%E3%82%92%E8%A1%A8%E7%A4%BA
- https://k-watanb.github.io/hugo/custom-theme/
画像は
static/images/logo.png
\themes\hugo_theme_robust\layouts\_default\baseof.amp.html
\themes\hugo_theme_robust\layouts\_default\baseof.html

場所変更↓(2022/09/08)
layouts\_default\baseof.amp.html
layouts\_default\baseof.html


<!-- 元 -->
<h1 class="logo">
  <a href="{{ .Site.BaseURL }}">{{ .Site.Title }}</a>
</h1>

<!-- logo.pngと文字 -->
<h1 class="logo">
  <a href="{{ .Site.BaseURL }}"><img src="{{ .Site.BaseURL }}/images/logo.png">{{ .Site.Title }}</a>
</h1>

<!-- logo.pngだけ --> これにした
<h1 class="logo">
  <a href="{{ .Site.BaseURL }}"><img src="{{ .Site.BaseURL }}/images/logo.png"></a>
</h1>
\themes\hugo_theme_robust-master\layouts\partials

場所変更↓(2022/09/08)
layouts\partials\custom.css

.logo img {
    height: 2.5em;
    padding: 0 5px;
    vertical-align: bottom;
  }
コードのハイライト
- config.toml内に記載
- この場合、styleはmonokaiとしている
- highlight.jsはコメントアウト
# config.toml(抜粋)

# enableHighlight = true # highlight.js option

  [markup.highlight]
    anchorLineNos = false
    codeFences = true
    guessSyntax = false
    hl_Lines = ''
    lineAnchors = ''
    lineNoStart = 1
    lineNos = false
    lineNumbersInTable = true
    noClasses = true
    noHl = false
    style = 'monokai'
    tabWidth = 4
はてなブログカード
- shortcodeを使う
themes\hugo_theme_robust-master\layouts\shortcodes\blogcard.html

場所変更↓(2022/09/08)
layouts\shortcodes\blogcard.html
blogcard.htmlを新規作成
amazonアソシエイトは、はてなブログカードだとnot foundになってしまう!
amazon アソシエイト
- shortcodet使う
- はてなブログカードと同じ感じ
- 価格も表示されて良い
- でも古風な感じ
参考: https://encr.jp/blog/posts/20200308_night/
themes\hugo_theme_robust-master\layouts\shortcodes\Amazon.html

場所変更↓(2022/09/08)
layouts\shortcodes\Amazon.html
Amazon.html を新規作成
<iframe style="width:120px;height:240px;" marginwidth="0" marginheight="0" scrolling="no" frameborder="0" src="{{.Get "src"}}"></iframe>
使うときは記事md内に以下のように書く
# 先頭の{は全角になっているので、半角に直して使ってください

{{< Amazon src="//rcm-fe.amazon-adsystem.com/e/cm?lt1=_blank&bc1=000000&IS2=1&bg1=FFFFFF&fc1=000000&lc1=0000FF&t=yourasocciateid&language=ja_JP&o=9&p=8&l=as4&m=amazon&f=ifr&ref=as_ss_li_til&asins=B07MD59S83&linkId=e84d300a869f1ef24755086e07875f21" >}}
できたイメージ↓
と書く
参考とはちょっと違う書き方なので注意
Amazon 大文字小文字区別される Amazon.htmlに合わせる
src=以降はAmazonのアソシエイトツールバーのテキストと画像からコピる
部分コピで面倒なのでブックマークレットを作りたい(作ってない)
→ ブックマークレットじゃないけどpythonで作った。別記事で紹介(2022/06/23追記)
lastmod 記事の更新
- 参考:
- localでは確認できないので注意
- 新規記事
- frontmatterにlastmodの記載不要
- lastmodが書いてなければ、gitにpushした日付が出るため
- frontmatterにlastmodの記載不要
- wordpressから移行した古い記事の更新時
- frontmatterからlastmodを消す
- そうすればgitにpushした日付が入る
- frontmatterからlastmodを消す
- wordpressから移行した古い記事
- ただ載せ替えならfrontmatterにlastmod必要
- 上記のようにlastmodが未記載だとgitにpushした日付が入るため
enableGitInfo = trueは書かなくてもgitの日付が入ったが、入れ忘れていたので記載した
# config.toml

# frontmatterにlastmodが書いてあったら、lastmod、gitにpushした日付の順に読み込まれる
# lastmodが書いてなかったらgitにpushした日付が勝手に入る

enableGitInfo = true

[frontmatter]
lastmod = ["lastmod", ":git", "date", "publishDate"]
mobileで画像のアスペクト比がおかしくなる問題(解決)
https://tbsmcd.net/post/image_processing/
- 動作した
- でもiphoneではアスペクト比が相変わらずおかしい
- img800x.htmlはthemesではない方に作って適用された
- 以下でできたのでこれは不要だが、一応そのままにしておく
- layouts\shortcodes\img800x.html
これが答え
- こんにちは。私のサイトではhyde-xのテーマを使っています。画像をアップロードして、携帯端末や狭いブラウザでサイトを見ると、画像の縦横比が歪んでしまい、縦長に見えたり、痩せて見えたりします。横幅は縮小されるのですが、縦幅がある一定以上縮小されないという現象が起きているようです。これは、レスポンシブデザインと関係があるのでしょうか。cssでこれを修正する場所はありますか?それとも、特定の画像サイズをエクスポートする必要があるのでしょうか?ありがとうございます。
- 私は自分自身の質問に答えたと思います。この提案7を元に、テーマのpool.cssファイルのimgの部分にheight: autoを追加したら、直ったようです。
- OK、この問題についての詳細です。画像タグで高さを指定した場合のみ画像が歪むことがわかりました(幅を指定しなかった場合でも…私が知る限りではですが)。私は通常、高さを指定しませんが、私の古いワードプレスサイトからエクスポートされた画像(Wordpress to Hugo exporter 1を使用してエクスポートされた)は、ワードプレスのおかげで、すべて高さが指定されていました。height: autoは問題を解決してくれますが、heightを指定しない場合は問題ないかもしれません。
height: 100%; を height: auto; に変更
themes\hugo_theme_robust-master\assets\styles.scss

場所変更↓(2022/09/08)
assets\styles.scss

article.sn > .article-body img,
article.sn > .article-body figure img,
article.sn > .article-body figure amp-img {
  box-shadow: 0 1px 3px rgba(0,0,0,0.12), 0 1px 2px rgba(0,0,0,0.24);
  max-width: 100%;
  height: auto;
}
月別アーカイブとタグの表示
- https://syocky.netlify.app/blog/2019/09/21/customize-hugo-robust/
- サイドバーには表示されない
- 記事には表示される
- https://www.ame-kuma.com/post/site02/
- こちらも参考
- サイドバーに表示された
- hugoのバージョンで方法がかわるっぽい
- baseof.html に書く
カテゴリは消してタグとアーカイブのみにする
# config.toml

[taxonomies]
  tag = "tags"
  archive = "archives"
# frontmatter

tags: ["HUGO","robust"]
archives: ["2022/03"]
themes\hugo_theme_robust-master\layouts\partials\archives.html

場所変更↓(2022/09/08)
layouts\partials\archives.html

{{ with .Site.Taxonomies.archives }}
{{ partial "taxonomy.html" (dict "context" $.Site "key" "archives" "value" . "baseurl" $.Site.BaseURL) }}
{{ end }}
themes\hugo_theme_robust-master\layouts\_default\baseof.html

場所変更↓(2022/09/08)
layouts\_default\baseof.html

<aside class="l-sidebar">
  {{ partial "author.html" . }}
  {{ partial "latests.html" . }}
  {{ partial "categories.html" . }}
  {{ partial "tags.html" . }}
  {{ partial "archives.html" . }}
</aside>
サイドメニューのLATESTSの表示数を変更する
latests.html 中で first 5 なら 5個表示される
デフォルトは10
以下は5個表示の例
themes\hugo_theme_robust-master\layouts\partials\latests.html

場所変更↓(2022/09/08)
layouts\partials\latests.html


該当部の抜粋
{{ range $i, $p := (first 5 .Site.RegularPages) }}
サイドメニューのタグ、アーカイブの表示数を変更する
taxonomy.html中で first 30 なら、30個表示される
デフォルトは10
以下は30個の例
themes\hugo_theme_robust-master\layouts\partials\taxonomy.html

場所変更↓(2022/09/08)
layouts\partials\taxonomy.html


該当部の抜粋
{{ range $key, $value := first 30 .value.ByCount }}
サイドメニューの月別アーカイブの表示順を新しい月順にする(未解決😅)
やりたいこと:
- 現状は、記事の多い順に月別アーカイブは並んでいるが、新しい月順に並び替える
- tagだろうとarchivesだろうとどちらもtaxonomyであり、記事の要素順に並んでいるのをタイトル昇順に変えればいいと思う(2回目)
参考:
https://note.dokeep.jp/post/hugo-archives/
記事内のサムネイル画像を非表示(false)にする
# themes\hugo_theme_robust-master\layouts\_default\summary.html

場所変更↓(2022/09/08)
layouts\_default\summary.html
# 一部のみ記載

# 前
<article class="sn">
  <div class="thumb thumb-{{ .File.UniqueID }}"></div>

# 後
<article class="sn">
  {{ if .Site.Params.Posts.show_thumb_post | default false}}
  <div class="thumb thumb-{{ .File.UniqueID }}"></div>
  {{ end }}
# config.toml
# [params] に追記

[params]
show_thumb_post = false
1ページに表示する記事数を増やす
デフォルトだと10記事表示だが、paginate = 20で20記事表示される
# config.toml

paginate = 20
参考:
https://takaken.tokyo/dev/hugo/config/hugo-config-description/
XserverレンタルサーバーからNetlifyにドメイン移動
Netlifyから与えられたドメイン: affectionate-snyder-c94d05.netlify.app/
独自ドメイン(これまで使ってた): atooshi-note.com/
WordpressはXserver上で構築し、独自ドメインもキャンペーンで無料で取得していた
HUGOへの移行で、Xserverレンタルサーバーは解約し、Xserverドメインだけ契約を残す
ドメインのヒモ付を変更する
Xserver(ここでは旧サーバー)はそのまま残しつつNetlifyに紐づけして、移行が完了したらXserverを切る流れとなる
参考:
https://ysmlog.net/posts/blog-domain-exchange/
https化、リダイレクト設定:
https://note.com/koushikagawa/n/n23c0783bf05e
リダイレクトファイルはHUGOの場合はstatic直下に置く
static\_redirects

http://affectionate-snyder-c94d05.netlify.app/*  https://atooshi-note.com/:splat  301!
https://affectionate-snyder-c94d05.netlify.app/*  https://atooshi-note.com/:splat  301!
http://atooshi-note.com/*  https://atooshi-note.com/:splat  301!
これで昔のドメイン(affecti…netlify.app)にアクセスがあっても、今のドメイン(atooshi…com)に流してくれる
リダイレクトについては、ビルドが必要だが、gitでcommitしてpushすれば、 Netlifyが自動ビルドしてくれる
これらの変更をした直後は、しばらくは
無効なURLです。 プログラム設定の反映待ちである可能性があります。 しばらく時間をおいて再度アクセスをお試しください。
が出ているが、キャッキュを消したり待っていれば表示されるようになる
ドメイン変更に伴いconfig tomlのbaseURLを変更
# config.toml

baseURL = 'https://atooshi-note.com/'
googleAnalytics の設定(独自ドメイン設定後)
参考: https://itsys-tech.com/list/hugo/002/
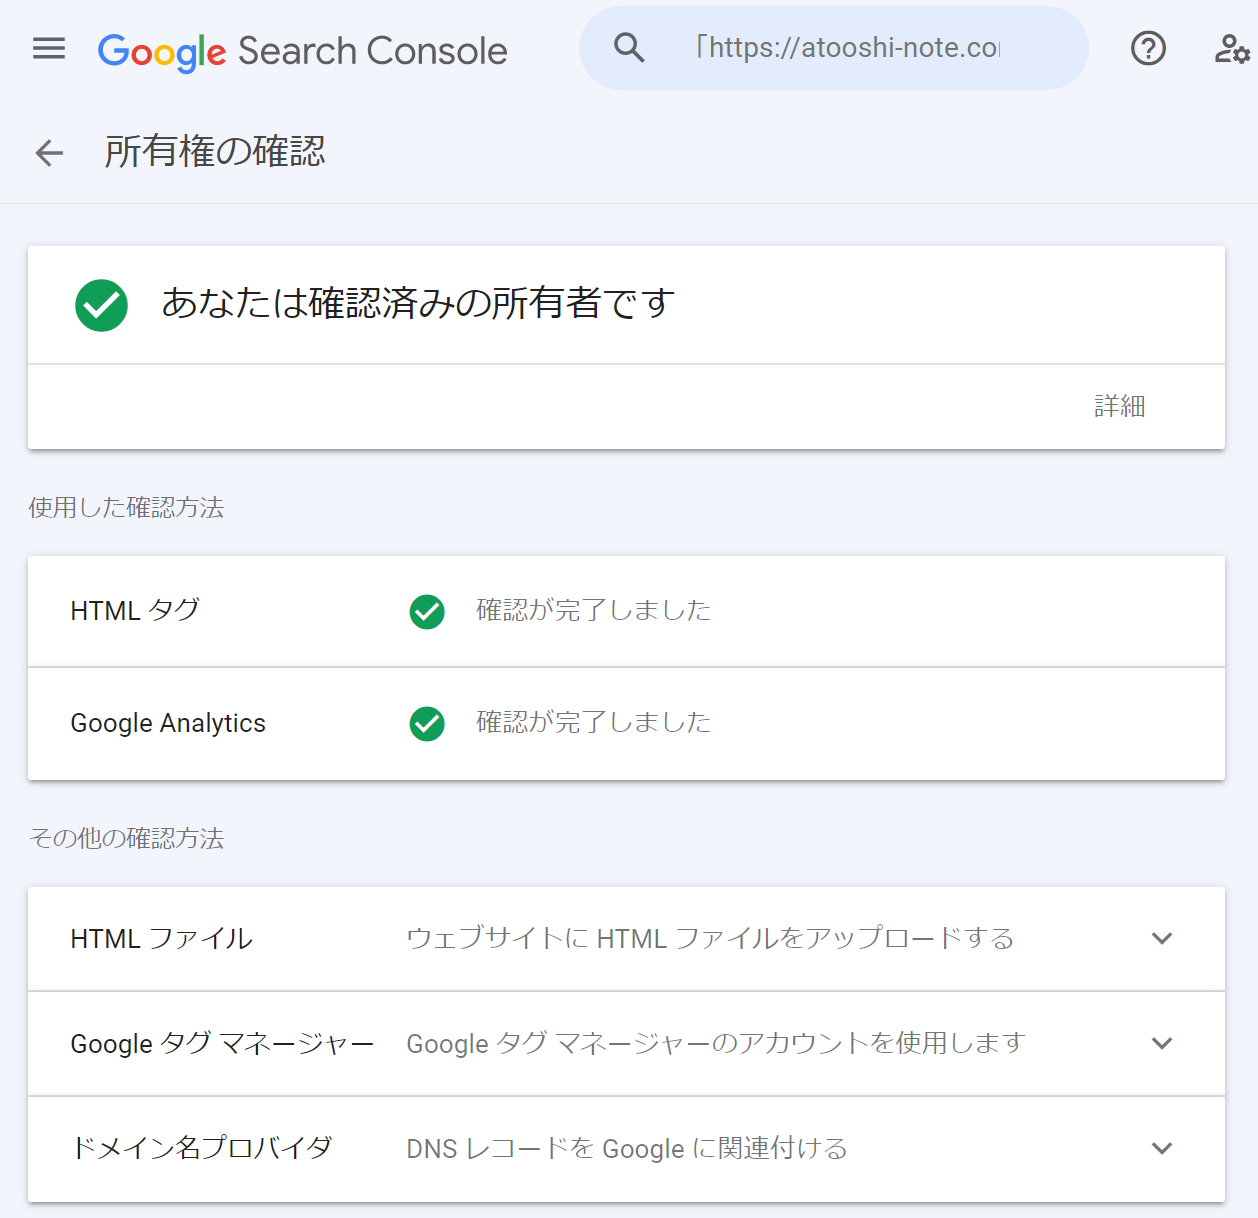
Google Search Console の設定(独自ドメイン設定後)
特に何も触らずおkぽい?(以前のママ)
参考: https://zetton86.github.io/blog/20200114/
参考に記載の、
ブログにHTMLタグの追加(所有権の確認)
については、HTMLタグは確認が完了しました となっている(wordpressの時のデータが残ってしまっている?)
google Search Consoleにサイトマップの登録
は、やっていない
/public/sitemap.txt は無い
Netlifyがなんかやってるけど、理解していない
Google AdSense の設定
記事を更新順にし、記事一覧に更新日を表示
デフォルトだと記事作成日順ですが、更新順にする
localだと反映されない模様(まず、localだと更新日が出ない)
古い記事だと、並び替えられないのもある(記事の更新日は新しくなっているが)
タグ、アーカイブの一覧ページも更新順になる
li_sm.htmlも変更したがサイドバーのLATESTSは記事作成日順のまま(そこに表示される記事には更新日が表示されるようになったが)
themes\hugo_theme_robust-master\layouts\_default\list.html

場所変更↓(2022/09/08)
layouts\_default\list.html


{{ range $paginator.Pages.ByLastmod.Reverse }}
themes\hugo_theme_robust-master\layouts\_default\list.html
themes\hugo_theme_robust-master\layouts\_default\li_sm.html

場所変更↓(2022/09/08)
layouts\_default\list.html
layouts\_default\li_sm.html


<li><i class="fas fa-sync" aria-hidden="true"></i><time datetime="{{ .Lastmod.Format "2006-01-02T15:04:05JST" }}">{{ .Lastmod.Format ( .Site.Params.dateformat | default "Jan 2, 2006") }}</time></li>
{{ else }}
<li><i class="fas fa-calendar" aria-hidden="true"></i><time datetime="{{ .Date.Format "2006-01-02T15:04:05JST" }}">{{ .Date.Format ( .Site.Params.dateformat | default "Jan 2, 2006") }}</time></li>
{{ end }}
disqus でコメント(2023/06/25 無効化中)
参考:
https://michimani.net/post/blog-install-disqus-to-hugo/
disqusのshortnameについて:
https://help.disqus.com/en/articles/1717111-what-s-a-shortname
# config.toml

disqusShortname = "atooshi-note"
themes\hugo_theme_robust-master\layouts\_default\single.htmlにはすでに{{ template "_internal/disqus.html" . }}の記載があった
表示場所はそのままでよいので触らず
カスタマイズ
themes以下のファイルを直接カスタマイズしていましたが、元はそのまま残したいと考え直したため移動します。
themes以下にあったカスタマイズしたいファイルの中身をそのまlayouts以下にコピーして、それを編集します。
ま、これが正規のやり方っぽいですが笑
themes\hugo_theme_robust-master\layouts
↓
layouts

assets\styles.scss に関しても同様
HUGOではlayouts以下のファイルが先に読み込まれるようです。
随時更新します😎